Chimney Relining DIY: Installing a chimney liner.
Chimney Relining is a job that can be done by the do it yourself homeowner but seems to be a project that the "unknown" or lack of knowledge seems to scare many away from. Hopefully we can change that.
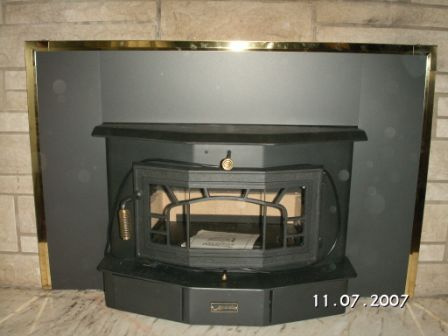
This page covers chimney relining using a stainless steel flexible chimney liner and being hooked up to a fireplace insert as it is one of our most common applications. We will go on to cover as many other types of installations including flue only, tee through wall thimble style, pre-fabricated chimney to an insert, and any others we can think of or get questions about.
If you have any questions about how to install a chimney liner and when a chimney reline is needed, chimney liner costs, or what the difference in chimney liners is or what type you should use for your situation, these topics are covered through the links below. Continue reading and learn how to install a chimney liner.
When do I need a Chimney Reline?
What type or grade of chimney liner do I need?
The first thing to do when installing a chimney liner to a fireplace insert is check the inside dimensions of the flue. Then check the location of the exhaust opening on the fireplace insert to make sure it will clear the lentil bar and have enough room for the chimney liner to enter it or the insert boot (if used)correctly. Then based on the size of the flue, and the requirements of the inserts exhaust specification, choose a chimney liner that at least meets the minimum exhaust requirement of the fireplace insert and will have enough room to fit down the chimney correctly. It is recommended that the outlet size of the unit be used instead of downsizing any time the flue will allow it.
When choosing a liner size it is recommended to have at least 1 1/2" extra room if planning to use a blanket style insulation to properly insulate the liner. Also make sure if the flue tiles have settled and are offset (not perfectly lined up end to end) to reduce your actual inside dimension by that amount.
If there is not enough room for blanket style insulation, or you plan on using a mix and pour style insulation, it is recommended to have at least an inch larger inner diameter flue then the liner diameter, minus any offset in the flue tiles
After finding the correct size liner for the job, make sure all the components you will need are on hand before starting the job. For chimney reline going from the top of the flue terminating at a fireplace insert, here is a typical list of parts needed when connecting stove pipe to flue liner:
1. Flexible chimney liner
2. Top plate that will cover opening/tile at the top of the chimney and overlap slightly to keep the elements out
3. Top clamp on this connecting flue liner to stove pipe if needed. Light weight liners usually have this built into the collarplate, heavy liner usually need this to support the weight.
4. Rain cap. Most kits include one of these to fit as a package but an existing cap may be usable depending on the parts involved.
5. Insert adaptor to allow a strong connection into the collar of the insert or insert boot if used.
6. Insert boot - needed if the insert has a flush opening instead
of a collar to make an attachment. Some boots also make the job easier by allowing the chimney liner to enter at an angle giving a lot of flexibility on hooking the liner to the unit, especially in tight situations.
7. Chimney Liner Insulation - Either a blanket style kit or pour and mix type of insulation. It is very important to insulate a chimney liner to keep your warranty through most manufacturers and can prevent service and safety issues as well.
Click on the links below for instructions on how to insulate a chimney liner and FAQ on the importance of a properly insulated chimney reline.
The Importance of a Properly Insulated Chimney Liner
How to Install A Chimney Liner:
Start by removing anything existing from the firebox if applicable and obtain access to the top of the chimney.
If this is a chimney liner going to a fireplace insert it is best to test fit the wood stove in the firebox with it in position that the trim will be installed at when finalizing the job to make sure the exhaust opening on the stove will properly line up with the area the liner will have to come through. If it is a shallow unit or there is an abnormal depth to the "Lentil" bar and area an insert boot may help cheat the opening back a bit and give a better angle for the chimney liner to meet the fireplace insert.
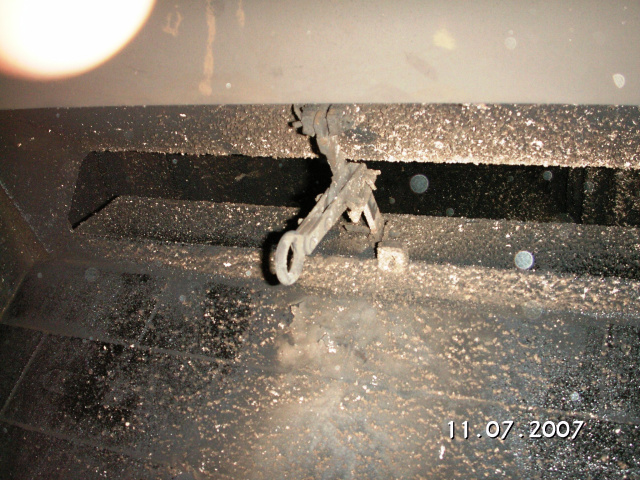
Once you have made sure you can make the connection to the unit, its time to get started. Remove the insert and look at the damper area of the firebox. Almost always part of the damper assembly and some firebrick material need to be removed to fit even a six inch liner through the damper. To do this you will need to grind or cut out the rear lower section of the damper housing. This is the metal part that runs on top of the firebrick at the bottom of the damper frame where the damper plate would sit and pivot. You will want to remove enough to give more than enough clearance through the center to get your chimney liner through. We typically use a 4-inch angle grinder with a metal cutting wheel or reciprocating saw (the grinder works best). Next, you will need to remove enough brick and mortar below the damper section that was just removed to allow the chimney liner to pass through front to back (Usually the mortar is just below the damper frame and one to two rows of firebrick in the center).

Once enough room is made to get the liner through the damper it's time to go to the roof. Un-roll the chimney liner as straight as possible. It is recommended to have a second person help handle the liner during this process. If you need to insulate the liner or you are using spacers, install them now. If the chimney is long or has offsets or obstructions you may want to use a "bell or end cone" to help feed the liner through the chimney.
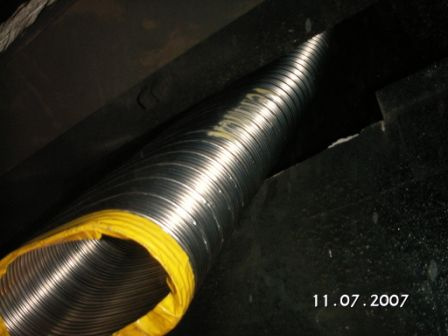
Carry the liner to the top of the chimney and make a large arch with the liner while feeding the leading end into the flue of the chimney. By making an arch you get a better angle to insert the chimney liner and reduce the risk of kinking it from too sharp of a bend. Continue to feed the liner down the chimney until it gets to the damper area. Have one person stay at the top to support the liner while a second person helps feed the liner through the damper area from the bottom. Once through the damper area, have the person up top hold the liner in place while the person below installs the appliance connector to the chimney liner. Raise the chimney liner back up to slightly above the height of the stove you will be connecting to and slide the insert back into the fireplace under the supported liner. Again have the person on top slowly drop the liner down while you guide it into the exhaust port in the wood stove. Make your connection to the stove using proper hardware (stainless steel screws or rivets typically). Install the stove trim if applicable and push the stove in to its final position. You are done at the bottom, time to finish up top.
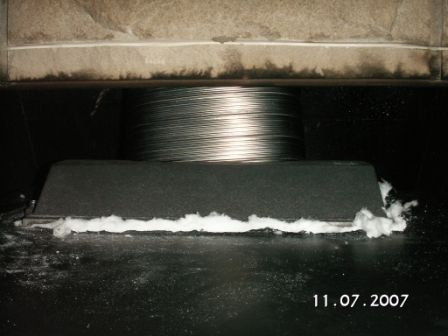
At the top, put a bead of 100% silicone sealant around the entire top of the flue tile or mounting surface. Drop the top plate over the liner and press it firmly to the sealant that was just applied. Pull up slightly on the liner and tighten the top clamp or collar plate band around the chimney liner then let go. It should seat against the sealant properly. Use a metal saw to cut the excess chimney liner off just above the top clamp or flush with the top of the collarplate. Install the rain cap over the assembly you just installed and you are finished.
(Note: The pictures used were of a job using an oval liner and oval cast iron insert boot. The amount of material removed behind the damper would have included the next row or so of firebrick under where the metal was cut out on a round liner installation).

